Experts share field-tested techniques for installing and repairing vinyl liners.
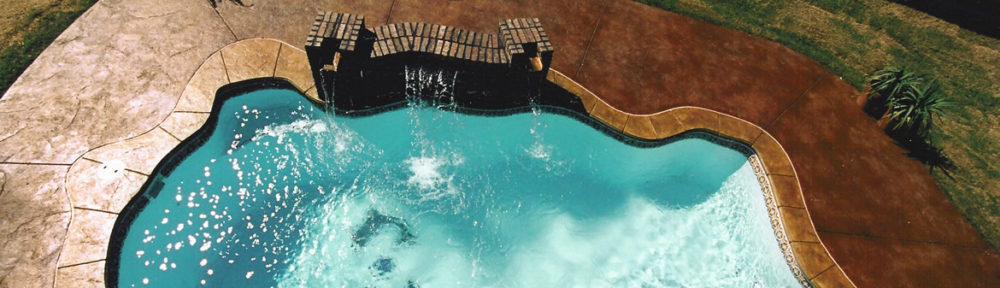
Vinyl liners are becoming more advanced every year. From plasticizers to UV inhibiters to thousands of color combinations, the options available to the builder and customer are nearly endless.
But even the newest liners are vulnerable to the same old issues, such as staining and punctures. Wrinkles seem to have a way of sneaking up from behind, and shrinkage can cause flotation in almost any climate. All these problems, however, have straightforward solutions.
Here, experienced pros reveal their secrets for mastering the art and science of vinyl, from installations to repairs.
Choose walls without foam
Vinyl liners are most durable when resting directly against metal wall panels. A layer of rolled foam backing puts the vinyl at risk for punctures and wrinkling, no matter what substrate it covers.
“Foam walls exacerbate liner puncturing,” says Michael Giovanone, president of Concord Pools and Spas in Latham, N.Y., a Pool & Spa News Top Builder.
Giovanone also points out that the weaker construction of a rolled foam layer lacks the holding power to keep a liner in place. “Foam lets liners creep and wrinkle,” he says, “because it doesn’t have a solid bond to the substrate or the wall.”
Imagine a piece of paper pressed against a hard surface, like a desktop; then imagine poking that paper with a sharp pencil. It’s nearly impossible to puncture the paper as long as it remains flush with the hard
surface. But lay that same piece of paper against a soft pillow, and any sharp object can rip right through it.
In short, a liner is only as strong as its weakest layer of backing.
“The backing behind a liner is the most important factor in that liner’s durability,” Giovanone says. “And the worst enemy of vinyl liners is wall foam.”
Measure and mark the liner
Fitting a liner’s beading onto the bead track can be a frustrating process. Manufacturers typically include markings on the liner’s underside to indicate its corners and center, and these can help a crew properly place the liner in the pool. But the manufacturer’s markings aren’t much help for aligning the top of the beading with the track.
“The manufacturer’s marks — the arrows — are just a rough approximation,” says John Warner, president of Done Right Pools and Spas in East Greenbush, N.Y. “And the manufacturer doesn’t put anything at the top of the bead.”
Warner, however, recommends a technique for ensuring the alignment is on target: Before unfolding a liner, measure it. Find the points where the top of the beading will actually line up with the corners of the bead track, and mark each of those alignment points on the liner’s underside.
“When I first open the liner up,” Warner explains, “I physically locate what I think is the exact spot where it’s going to line up with the corner at the top of the bead, and I make a little pencil mark at that spot on the back of the liner.”
Rethink sealing and vacuuming
During the initial installation, most crews hold the edge of the liner against the walls with duct tape or sandbags. But it’s not always possible to create a perfect seal this way. Wind, cold and dryness can quickly begin to stretch the seals, or even loosen the liner’s edges.
One possibility is to try a different approach right from the start. “Instead of duct tape,” Giovanone says, “use caulk to seal every [wall] panel before it gets bolted together.” Though this process takes more time, it creates a hardened seal that’s much less vulnerable to the elements.
Next, run the liner’s beading through the entire track. The usual practice at this point would be to leave part of the beading out of the track and tape an industrial vacuum pump behind the liner to tighten it. Giovanone says, “That’s completely wrong.” Instead, fit a vacuum pump over the top of the skimmer opening. As long as their dimensions are compatible, they’ll form a perfect seal.
“Liner vacs are manufactured to be square, and they’re meant to sit on top of the skimmer,” Giovanone explains. “It fits like a glove; you don’t need to use any tape.”
Because this scheme uses the vacuum’s shape and weight to secure the seal, it ensures a much tighter fit between the vacuum and the liner, and thus lowers the chance of wrinkles. When combined with the technique of caulking wall panels, it also avoids other taping-related issues, such as flotation.
“If you bead the liner and caulk your wall panels,” Giovanone says, “you will totally eliminate floating liners.”
Use only vinyl duct tape
If using duct tape on the liner is unavoidable, pick a brand made from vinyl. Many types of duct tape are made with cloth, which is an organic substance, and thus home to microorganisms that can quickly stain and degrade a vinyl liner.
“Pink and purple staining, which is a huge problem with vinyl liners, is actually the excretions from microorganisms,” Giovanone says. “It’s called microbiological staining, and it comes up through the
vinyl from the back.”
While shocking the pool will dissipate the appearance of the problem, this is only a temporary solution. Until the infection is totally destroyed, pink stains will continue to creep back through the liner.
The easiest way to avoid this issue is simply to avoid organic duct tape. Vinyl-based tape is inorganic, so it poses no threat to the liner.
Start filling as soon as possible
Because vinyl liners are designed to stretch to their full size under the weight of water, they’re most vulnerable to shrinkage immediately after installation, before the pool has been filled. Unless several inches of water are holding it in place, a liner may begin to shrink and float within 2 to 3 hours, even if a vacuum pump is pulling it tight.
“I’ve found that the old system of leaving the vac on, then pumping in water from the customer’s hose just doesn’t produce consistent results,” Warner says.
Instead of waiting for the hose to fill the pool, one option is to bring in about 9,000 gallons of water as your crew is finishing the installation. Once the liner’s wrinkles are brushed out and the vacuum pump is running, dump in enough water to fill the shallow end to a depth of about 6 inches.
“I always insist on it,” Warner says. “We have the water on hand as soon as installation is finished, and we dump it in the pool right away.” This prevents any shrinkage from taking hold during the first night, while the pool is being filled. Warner says this strategy is especially useful on colder nights, when liners are prone to shrinkage.
Though having water delivered does add an expense to the installation process, the benefits down the road will be well worth the initial cost. “It’s a money-saver for the customer in the long run,” Warner explains, “because the liner’s going to fit right, so it’s going to last longer.”
Hold onto that water
Groundwater seepage and shell uplift are major problems in areas with high water tables. Because vinyl pools require at least 6 inches of overdig, their sites are particularly susceptible to these issues. Hydrostatic relief valves aren’t always available to offset this danger, and the usual practice of pouring drained water onto the lawn only adds to the problem.
Fred Martin, president of Martin Pool and Spa in Pittsfield, Mass., has discovered a straightforward way to save money and prevent uplift at the same time. When draining a pool for repairs, instead of directing the flow of water to a deck drain (or the customer’s lawn), his techs pump all the drained water into tanks.
“When we go in to replace a vinyl liner,” Martin says, “we first set up some tanks to hold all the water we drain from the pool. That gives us a buildup of supply.”
When they’ve finished repairing or replacing the liner, the techs immediately return the stored water to the pool. This puts pressure back on the water table right away, and prevents the liner from floating while the pool is being refilled. It’s friendly to the environment, too.
“This way,” Martin explains, “you’re not wasting water, and you’re also making sure that if you’ve got ground water, it’s not going to come up through the sand or gunite.”
Source: Ben Thomas- Pool and Spa News | 6.25.2010