In-ground Swimming Pools

In-ground swimming pools can greatly increase the value of a home. More importantly, though, they can bring hours of recreation and enjoyment. An in-ground swimming pool is a place to play, exercise, entertain, or just float around, and it can make anyone cling to summertime for as long as they possibly can.

You have several options when you’re shopping for pools. There are countless designs and accessories to choose from. There are also landscaping choices that generally accompany the installation of a pool. You can even customize your pool, turning it into a water basketball court or a series of waterfalls and rocky islands. You also have to decide what construction materials the pool will be made of (concrete or fiberglass).

Buying In-ground Fiberglass Swimming Pools

For people in the Midwest or other parts of the country that regularly get hit with extremely cold weather, fiberglass is the only smart choice when it comes to in-ground pools. Concrete pools simply will not hold up under the strain the weather puts on them over an extended period of time. Fiberglass pools, on the other hand, are designed to stand strong through whatever winter might throw at them.

At Expert Pools, we make it easy for people to find a fiberglass pool that works for them. We have a huge selection of one-piece pools, and we offer an array of designs and styles. We will also work with people to come up with a financing plan that is fair and affordable. We have been in the fiberglass pool business for over 16 years and we are still growing because we have consistently been able to offer our customers high quality products and personalized service.

In-ground Pool Prices

When you purchase an in-ground fiberglass pool from Expert Pools, you are making an investment that can give you enjoyment on a daily basis for years to come. Our pools are built to withstand even the harshest of winters so you do not have to worry that the condition of the pool will deteriorate after only a few years. Our pools come in a variety of sizes and styles, so you can easily find something that suits your financial and recreational needs.

At Expert Pools, we have long been the leading pool distributor in the Expert. We offer more models and accessories than most other companies, and our pool designs are the industry standard. You can experience one of our fiberglass pools firsthand if you visit our showroom. We are also happy to come to your home to demonstrate how your pool will be laid out in your backyard, and to give you a free quote. Basic packages can cost anywhere from $ 20,000 to $45,000 but exact prices cannot be determined without a site visit.


Deck Options

The right pool deck can go a long way towards enhancing the look of your backyard. In fact, along with the pool itself, a deck can greatly increase the value of your property. At Expert Pools, we offer many deck designs that can complement the appearance of any home.

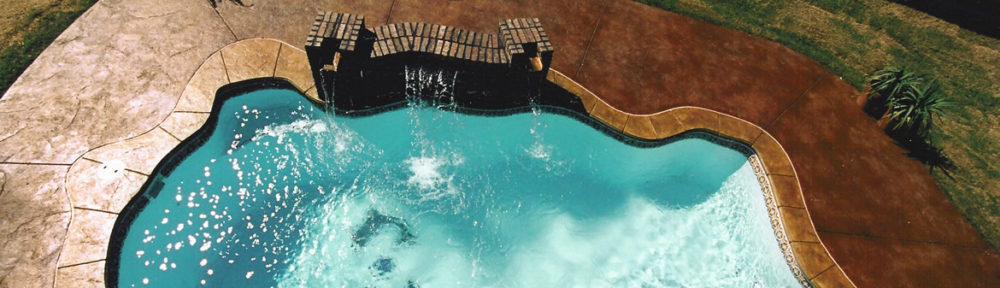
We have pristine white decks of broom-finished concrete with cantilever. We also have a broom-finished design without cantilever that gives the deck a more natural look. If you want a bit of color in your yard, you can choose from powder-dyed decks with broom or stamped finishes and exposed aggregate concrete decks. We can also customize your pool area with decorative paver bricks.

In-ground Pool Kits

Fiberglass in-ground pool kits offer superior construction and greater durability than concrete pools. Expert Pools’ fiberglass pools are the best on the market. Not only do our pools outperform their concrete counterparts, they are also stronger than any other top fiberglass design. That is because we use the latest technology to construct our pools, as opposed to most companies who are still drawing on techniques that were developed in the 1970s.

Standard in-ground pool kits come with circulation pumps, water filtering systems, and equipment pads. They also have several pool care items such as automatic chlorine feeders, automatic timers, chemical kits, and basic start-up maintenance supplies. At Expert Pools, we also include solar and winter covers, which allow you to extend the swimming season by keeping the temperature and condition of the pool at an optimal level.

In-ground Pool Kit Accessories

When you buy a Expert fiberglass pool, you can add a variety of accessories. We have optic lighting that can be arranged in a perimeter style, illuminating the outside of the pool, or a thru-wall style that actually alters the color of the water. Other optional flourishes include inlaid mosaic designs, step tiles, and alternative pool colors like whisper white or sapphire blue.

At Expert Pools, we also carry several accessories that make pool maintenance easy. We have different models of pool vacuums, electronic water purifiers, and an automated control center that allows you to monitor the cleaning process. You can contact us or come to one of our showrooms to learn about all of your options when buying a Expert fiberglass pool.

In-ground Pool Designs

At Expert Pools, we offer our customers a wide variety of fiberglass pool designs. We have shapes and sizes that will complement almost any backyard. Large, medium, small, and even miniature units are available, and samples of each can be viewed at one of our showrooms.

The Island Breeze, Sea Breeze, and Panama designs are just a few of the large fiberglass pools that we carry at Expert Pools. Depths range from under five feet to over eight feet, so there are options for those who want to dive and those who would rather string volleyball nets across the center of their pools. Our smaller designs vary in depth as well. Some were created specifically with exercise in mind, while others are more versatile.

Why Choose a Fiberglass Pool?

Fiberglass pools are superior to concrete pools in several different ways. The installation process for an in-ground fiberglass pool is extremely fast when compared to the length of time it takes to build an in-ground concrete pool. Fiberglass pools can also withstand cold climates that would create cracks through the foundation of the average concrete model, and fiberglass stands up better against algae and other natural invaders that tend to wreak havoc on concrete pools.

Our fiberglass pools are not only superior to concrete pools, they also outperform other fiberglass designs as well. The flexural strength of an average fiberglass pool measures 23,500 P.S.I., while ours measure 41,976. This means that our pools are almost twice as strong as most of the fiberglass models on the market. Our pools also employ unique technology such as our closed coping system that allows them to withstand frigid temperatures, ice, and snow–three elements that are all too common in the Midwestern states.

In-ground Pool Construction

When people think of pool construction, they often picture their yards being torn apart for months on end. This image is often the reality for those who choose to purchase in-ground concrete pools. However, if you buy a fiberglass pool from us at Expert Pools, it can be installed in as little as three days.

Our in-ground fiberglass pools are far stronger and more durable than any concrete pool on the market, and they are far superior to most other fiberglass models available. We have used the latest technology to create a unique fiberglass composite and a protective layer of vinyl ester resin that allows our pools to withstand winters in the cold climates. They will not crack due to frost, nor will they erode under the duress of high winds or ice storms.

The Installation Process

At Expert Pools, we control the entire installation process. This allows us to maintain our high standards, and it keeps installation time to a minimum. The shell of your pool is prepared for delivery at our warehouse. After we dig and contour the pool hole, we deliver the shell to your home, and set it. Once the shell is in place, backfill is placed around the pool and water is added. The plumbing is then installed, and concrete forms are set and laid. The pool is almost ready for use at this point. However, we perform a final cleaning and install your fencing to finish things off.

The construction of your in-ground fiberglass pool will vary if you choose to add design accessories. Extra time might be needed to inlay tiles, or to complete cascades or rock waterfalls. However, even if you choose the most elaborate custom design, construction and installation will still occur in a minimal amount of time.

In-ground Fiberglass Swimming Pools

Rectangle, kidney, lap, and freeform are just a few of the shapes of in-ground fiberglass pools. There are also splash pools, pools with waterfalls, lap pools, and game pools. In short, there are as many options when it comes to fiberglass pools as there are with concrete pools. There are just as many accessories for fiberglass designs, as well. Pools can be heated, enclosed, lit, or can even have pathways leading across them.

At Expert Pools, we are continually making improvements on the standard fiberglass pool. We offer more styles and sizes than have ever been available in the past. We have also strengthened our pools, made them climate resistant, created accessories that make maintenance minimal, and designed cosmetic features that beautify pools and can increase property values.

Financing In-ground Fiberglass Pools

Fiberglass pools are often more expensive than concrete pools, but the cost difference is made up for in durability. In an attempt to make the purchase of a pool easier for our customers, we offer several different financing options. All of these choices can be discussed in detail when you request a quote.

Most people think the best way to finance a swimming pool is through home equity. However, there are plans that will work for people who are not in a position to borrow against their homes. Some financing plans will require payments of $1,000 per month, while others will only call for monthly payments of $500. A small down payment will be required, as well. Give us a call to talk about the financing option that’s right for you.

How to Properly Test Pool Water

Developing some good habits will lead to much more effective and accurate water chemistry analysis.


Inaccurate test results are not always the fault of the water-testing equipment. Whether you use a test kit, test strip, portable meter or countertop lab, sloppy technique or poor housekeeping can interfere with results.

Fortunately, the situation can be rectified easily — and usually at no expense.

The first rule of thumb is to read the instructions every time when making a purchase. Even if it’s the same test equipment from the same manufacturer, something important in the procedure may have changed since you last bought the product. If a “simple” test strip has a required technique for successful use, you can bet the farm other testing supplies do, too.

Keep in mind that test results are not an end in themselves — they are used to make treatment decisions. If the sample employed for the test is not representative of conditions in the whole pool, the results will not be actionable.

First, use a clean sample container. And avoid sampling near return lines, chemical feeders and dead zones. Instead, try for the midpoint of the pool, as you want to take the sample at the specified depth.

In addition, when a treatment chemical has just been added, allow at least two filtration cycles to pass before retesting in order for the product to circulate.

Timing also is important. After taking a water sample, don’t let it sit for too long. The sanitizer residual is particularly apt to change, resulting in a false low because it tends to dissipate as the sample sits. If the instructions say to observe a wait time after adding reagent(s), do not omit this step. Copper, iron, manganese and nitrate tests often need extra time for proper color development. The cyanuric acid turbidity test is time-sensitive as well.

Using the wrong sample volume is another common mistake. In “teaspoon chemistry,” a little difference can have a major impact. Always have the bottom of the meniscus sitting on the fill line of the sample tube. If using a pipettor, remember to check for improper fills due to air bubbles. A volume-related mistake with liquid reagents commonly involves using the wrong drop size. In addition, the dropper bottles are meant to be held vertically when dispensing. If a technician holds the bottle at a slant, the amount of reagent released will be more than the test design calls for. Moreover, if static is allowed to build up at the tip, the drops dispensed will get progressively smaller, resulting in less reagent being added.

Another testing pitfall lies in incomplete mixing. Reagents in tablet or powder form must be completely incorporated into the sample water for the proper reaction to take place. In particular, if a test vial is square, make sure nothing is stuck in a corner.

The fixes here are easy: Hold the dropper bottle upright; discharge static by wiping the dropper tip with a clean, damp cloth; and swirl until any clumps of reagent dissolve.

It’s paying close attention to what’s happening during each and every test that’s the real challenge.

Ambient light is another important consideration in testing. Most manufacturers recommend conducting color-matching tests in natural light (but not looking into the sun). This is because artificial lighting skews color perception — as do sunglasses. If testing indoors, where finding natural light is inconvenient, buy an inexpensive illuminator, much like photographers use to simulate daylight, and perform color comparisons in front of it. Colorimeter users must be aware that stray light will interfere with a test — be sure to close the sample chamber lid/cap the chamber as directed.

Contamination also will foul up test results. Check to ensure there is no residue in your sample container or test cell left over from a previous test. Do not switch caps between reagent bottles, or let them become dirty when you remove them. For that matter, replace caps immediately after use so that air and humidity don’t get inside to spoil reagents or test strips. Never allow finger oils to come in contact with reagents — this means not using a finger as a cap for a test cell, and not touching the pads on a test strip.

Finally, all tests have range limits, and testing outside the limits will result in error. For example, phenol red indicator is widely used to determine pH. It works in the range of 6.8 to 8.4, which is where pH normally is for pools and spas. A pH below or above that range can result in a color reaction that does not match anything on the color chart, or a deceptive “match” to the first or last color standard.

(When in doubt, for an extreme low reading conduct a base demand test, or for an extreme high reading do an acid demand test, using the treated sample.) The remedy is to use another indicator, appropriate for that pH level; although most of us in this scenario would treat to raise/lower the existing pH into the desired range using the demand test results as a guide, and then retest with phenol red for confirmation.

If you see room for improvement in your testing technique, or in the way you care for your testing supplies, turn over a new leaf today. It’s just as easy to develop a good habit as a bad one. Your test results will reward you for it.


Source: Patricia Fitzgerald- Pool and Spa News | 8.12.2011

Fire & Ice

Nothing can substitute the drama of fire and water together. Here are some tips on using them in the backyard.

If you need an attention-getter in the backyard, you can’t do any better than a feature boasting fire and water.

With these elements, you can think big or small. If the family would like something intimate, a cozy fire and water bowl next to the spa will be a perfect fit. For those with a grander vision, you can create a miniature volcano with flames billowing at the top and water spilling down the sides, or a long fire trough in front of a sleek water wall.

Whichever direction you and your client choose to go, you need to set up the system correctly. Consider the following construction guidelines.

Separate the fire and water


Some designers and homeowners want to emulate resort-type features that shoot fire directly out of the water. This is done by bubbling gas up through the water, and introducing a spark of some sort to its surface. Installations of this type may be fine when designed for a resort by a specialty fire consultant. But experts caution against trying to do this in a backyard — particularly when working with remote-controlled systems.

“It goes against code, typically, with the electrical and the water,” says Kevin Doud, CEO of manufacturer Grand Effects in Irvine, Calif. “And we feel it’s very prone to maintenance issues, with having the electronics in the water.”

Some have tried using manually lit systems to create the effect. However, it becomes challenging to find submersible fire rings, and you have to consider how to manage the combustion byproducts and unburned gas residue that get trapped in the water. “We try to steer [designers] toward having the burner dry. In addition, we encourage housing all the electronics in a container to keep them dry, and hiding the mechanisms so it looks like you’re having fire come out of the water,” Doud says.

Most fire and water designs follow a relatively simple template. “[Many people] want an outer decorative bowl, which is filled with water and then overflows,” Doud says. “Then they want fire to be in the middle of the water.”

Some companies offer pre-manufactured fire bowls and custom-made fire troughs that do exactly that. In some cases, the water doesn’t even well up in the bowl, but is fed directly via pipe to a sheet fall manifold that spills out of the bowl.

When builder Joe Vassallo developed his trademarked WetFlame fire bowl, his first concern was separating the two elements, especially since his containers well up with water before spilling over. The president of Las Vegas-based Paragon Pools creates a spout in the rim of the container which allows the water to pour out long before it reaches the top. Then he places the fire ring at the rim, so it sits above the water exiting at the spout.

For larger features, the same principle of separation applies. For instance, if you want to install a fire trough in front of a water wall, you should create different receptacles for the fire bars and the spillover from the wall, says Bob Roman, president of Fire by Design, a Henderson, Nev.-based manufacturer of fire and water features.

It’s also a good idea to drill drainage holes in the container that holds the fire hardware. This way, rainwater won’t submerge the remote modules or pilots inside. Roman recommends that troughs be built above deck level — as part of a raised bond beam for example. Building these containers on-ground doesn’t provide a place for proper drainage.

Use the right hardware
When working outdoors, always use stainless steel fire rings and bars. Black steel will rust fairly quickly, causing the outlet holes to clog. Roman estimates that, if you choose the less-expensive black steel, you’ll need to replace it every year or two.

Install the ring or bar with the small holes pointed downward. These openings release gas to create the flame, and if water gets into them, it will impede the ring’s ability to light. Placing it upside down helps keep the area dry.

Choose a container that can withstand heat. Vassallo works mostly with concrete bowls, although he’s also had them custom-made using stainless steel with a copper coating. To keep the container relatively cool during use, Roman recommends leaving 6 inches between the fire ring or bar and the edge of the pot or trough.

Also keep in mind that the red and yellow flames that are common in backyard applications tend to leave soot behind, which can stain other materials. For this reason, consider darker colors and surfaces around the fire that will be easier to clean.

You’ll need a filler of some type to help conceal the fire ring and other hardware that you place in the container. This way, the installation looks great both day and night. The ideal material is something large enough to leave voids for air to get through. Leave the material clear of the pilot, Doud says. Roman advises against using sand in remote-controlled systems because it will smother the flame sensor.

The only type of rock known to be completely safe is lava. Other kinds of stone can explode or pop out of the receptacle when it gets hot. Crushed glass can be effective, as long as it’s tempered. To keep it away from the pilot, Doud suggests placing stainless steel mesh over the burner assembly before laying down the glass. The openings should measure about 1/4 inch to prevent the glass from falling through. Be warned that if used in a fire pot, smaller pieces of glass can spill over the spout into the pool water, Vassallo says.

Run the lines for efficiency
When it comes to running the gas lines, think like a plumber. Minimize the run lengths and number of elbows as much as possible, Doud says. Avoid flex gas lines.

You may also need to use manifolds. If you’re creating an especially long trough of fire, you may need to have two bars laid end to end. “The challenge with burner bars over 8 feet long is maintaining a constant flame height from one end to the other,” Roman says. When his clients need their flame to be longer than that, he advises that they use two fire bars of equal length, and connect them with a manifold. Like a plumbing manifold, this will ensure equal flow to each bar.

The low-voltage electric lines on remote-controlled systems deserve the same kind of attention when you repeat the fire throughout the yard. If, for instance, you have two or more fire bowls in a line — say, along the top of a wall — you’ll probably want to operate them all at the same time.

You can hook them up to the same control button. Run the low-voltage line from one bowl to the other and connect them to the same control, Roman says. If, on the other hand, you have a few fire and water features scattered throughout the yard, the homeowner will probably want to light them at different times. In that case, hook each unit up to its own button on the control pad.

Follow the rules for remote-controlled fire
Check local electrical codes to see if low-voltage power can be installed adjacent to the pool. Some municipalities won’t permit it within 10 feet.

Be sure to allow enough space in the container for the fire unit, Roman says. For instance, if you’re placing remote-controlled fire among artificial rocks, you will need a space measuring at least 10 inches in diameter and 10 inches deep for the fire and remote module.

Even though it will be powered by the push of a button, many codes require that you install a manual shutoff valve if the remote uses electronic ignition. Electronic controlled gas valves can stick open, while the manual shutoff provides a backup. Additionally, this allows the homeowner to adjust the flame to the desired size.

Source: Rebecca Robledo– Pool and Spa News | 10.30.2009
Fiberglass Swimming Pool Prices

At Expert Pools, we urge you to stop by one of our warehouses to see the finest selection of fiberglass pools in the state. You can check out the variety of styles we have to offer, and you can even take a dip in our fully-installed, fully-functional swimming pool. This will give you a chance to enjoy all of the benefits that fiberglass pools have to offer.

There is a common misconception among many Americans that fiberglass pools are not as strong as those constructed of concrete. In fact, the opposite is true. Our fiberglass pools are 17 times stronger than concrete models. They also are far better equipped to withstand ground shifts and inclement weather. Our pools are so strong that we are able to offer a structural lifetime guarantee on them. Basic packages can cost anywhere from $ 20,000 to $45,000, but this is generally far less than a contractor would charge for installing a new concrete pool.

Receive a Free Quote

There are several issues that will affect the price of your fiberglass pool. The design, accessories, layout, and more will be considered to determine the cost. However, regardless of the price of your pool, you will save money on maintenance and upkeep with fiberglass, and you will be able to enjoy your pool for a very long time.

At Expert Pools, we can provide you with a free in-house quote. This gives us a chance to view your backyard and to show you exactly how your pool will be laid out. If you are interested, we can even take you out to view the installation process, so you will know exactly what to expect when your fiberglass pool arrives

Fiberglass Swimming Pool Installation

Anyone who has had a concrete swimming pool built in their backyard knows that the process can take months. Fences are ripped down, yards are torn apart, and foundations are laid and re-laid. By the time the job is complete, one swimming season has passed and it is months until the weather turns warm again.

A fiberglass pool can be installed within a few weeks. Once a person’s backyard has been surveyed, the pool layout is marked. Once the installation begins, the hole will typically be dug in one day. When the hole is ready, the pool is set, and then it is filled with water. Electrical and plumbing equipment is then put into place, and then a concrete foundation is poured around the pool. If all of the prep work has been done, the actual installation should be fast and incident-free. Most jobs are completed within a few weeks not months.

Installing Indoor Pools

There are concerns that are specific to the installation of an indoor fiberglass pool. The pool will be delivered in one piece, and it is important that the hole is dug to the correct specifications because access can be very tricky. Indoor pools are often installed after the footings. If this is the case, footings must be set at least 18 inches deeper than the shell. There are also issues with air quality control, floor drains, corrosion resistant interiors and several other factors that need to be considered. At Expert Pools, we will happily help you make installing an indoor pool a pleasurable experience. Don’t let your dream turn into a nightmare